A cake turntable is the single tool that separates a home-baked cake from one that looks like it came out of a professional bakery. The rotating platform gives you consistent access to all sides of the cake without ever lifting or repositioning it — and that steady rotation is what makes smooth, even buttercream possible for anyone, regardless of skill level.
If you have a turntable sitting in your kitchen and are not sure how to get the most out of it, or if you are considering buying one, this guide will walk you through everything: setup, the crumb coat, applying the final layer of buttercream, using a scraper for a smooth finish, and creating textured effects. Every technique in this post can be done at home with basic tools available from Bakeyy.

What you need before you start
You do not need a large toolkit to frost a cake well. Here is the focused list of what actually matters:
- A cake turntable — plastic, metal, or electric
- A cake scraper — a flat straight-edge scraper for smooth sides, or a comb scraper for textured finishes
- An offset palette knife or spatula for applying and spreading buttercream
- A cake drum board sized to match your cake
- A batch of buttercream, ganache, or whipped cream for frosting
- Optional: piping bags for applying buttercream more precisely
That is genuinely the complete setup. The turntable and scraper do the heavy lifting — the rest is practice.
Choosing the right turntable
Not all turntables work the same way, and choosing the right one for your style of baking makes a noticeable difference.
Plastic turntables
Lightweight, affordable, and perfectly functional for home bakers. The main consideration with plastic turntables is stability — the base should have a non-slip grip so it does not slide on your counter while spinning. Bakeyy stocks a cake turntable with a non-slip base that gives a smooth, consistent rotation at an accessible price point.
Stainless steel turntables
Heavier than plastic, which means they are more stable on the counter and spin with greater momentum. The extra weight is an advantage when applying pressure with a scraper — the turntable does not wobble or lift off the surface. Bakeyy carries both a 10-inch stainless steel rotating cake stand and an 11-inch/12-inch version for larger cakes.
Electric turntables
These rotate automatically at a consistent speed, leaving both of your hands free to hold a scraper and spatula simultaneously. Particularly useful for beginners who find it difficult to spin the turntable with one hand while holding a tool steady with the other. Bakeyy's Electric Cake Decorating Turntable comes in two sizes and two colour options, starting at Rs. 740.
What size turntable do you need?
The turntable platform should be at least 2–3 inches wider than your cake on each side. For a standard 6-inch round cake, a 10-inch turntable works well. For an 8-inch cake, use a 12-inch turntable. If the cake overhangs the edge of the platform, applying side frosting becomes much harder.


Step 1: Set up your turntable correctly
Before the cake goes on, take two minutes to prepare your workstation properly. This prevents the most common beginner problems — a sliding turntable, a cake that shifts during frosting, and wasted buttercream.
- Place the turntable on a clean, dry, flat surface. A wet or oily counter will defeat the non-slip base and the turntable will spin when you do not want it to.
- Place a cake drum board on the turntable. A cake base or drum sits between the turntable and the cake, providing a stable platform and making it easier to transfer the finished cake. Put a small dot of buttercream on the turntable surface before placing the board — this anchors it so it does not spin independently.
- Anchor the cake to the board. Place a small amount of buttercream at the centre of the drum and press your first cake layer down firmly. This prevents the cake from sliding sideways when you apply pressure with the scraper.
- Test the spin. Give the turntable a slow push with your fingertips. It should rotate smoothly without wobbling or catching. If it wobbles, check that all four feet are level on the surface.
Good preparation at this stage saves significant frustration later. A cake that shifts mid-frost will pull the buttercream unevenly and require you to start again.
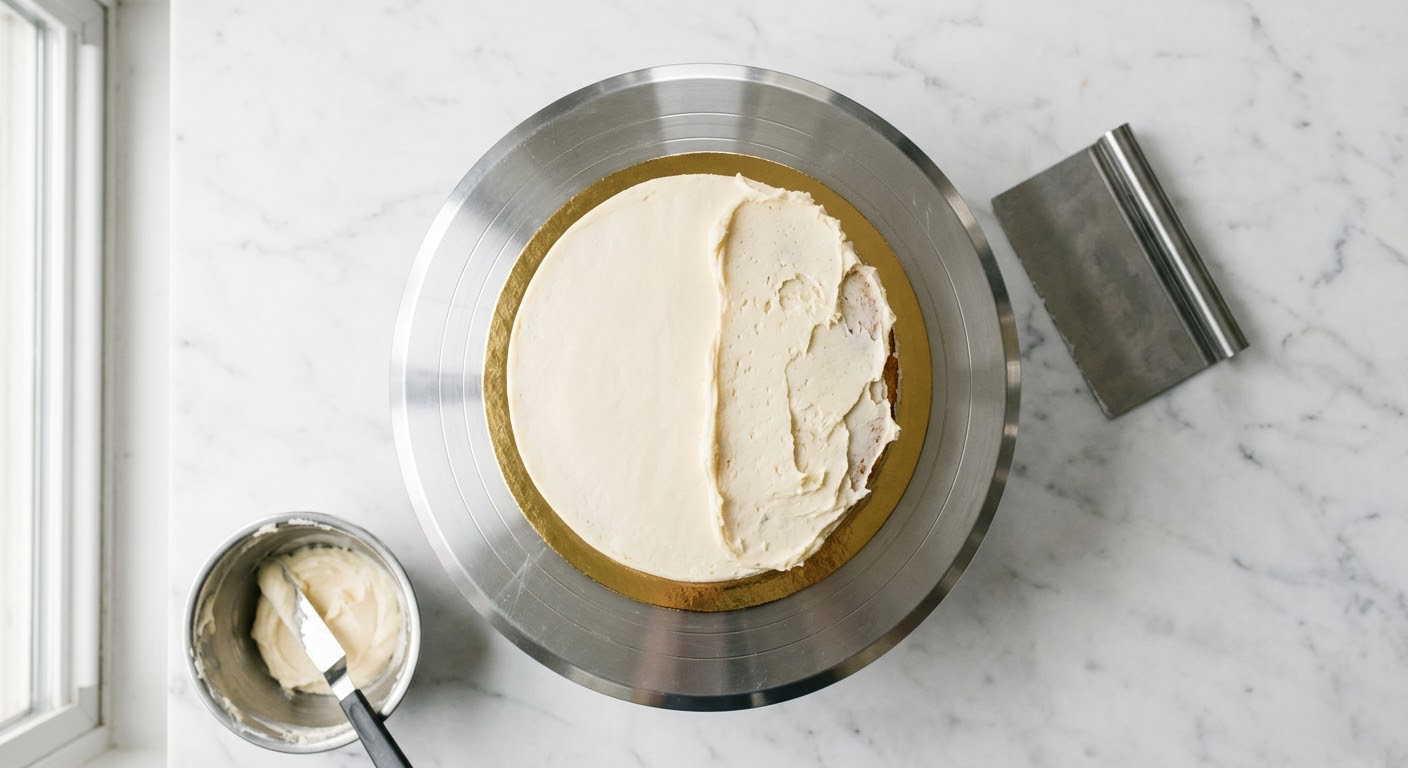
Step 2: Apply the crumb coat
The crumb coat is a thin, initial layer of buttercream that traps loose cake crumbs on the surface before the final smooth coat goes on. Skipping it is the single most common reason home-baked cakes have visible crumbs embedded in the final frosting layer.
How to apply the crumb coat
- Place the first layer of cake on the drum board. Add a generous dollop of buttercream to the top and spread it flat to the edges with your palette knife, rotating the turntable slowly as you work.
- Stack the next layer and repeat, adding buttercream between each layer. Press the cake down gently after stacking to make sure the layers are level.
- Apply a thin coat of buttercream to the entire outside of the cake — top and sides. This coat does not need to be smooth or perfect. Its only job is coverage.
- Hold your scraper lightly against the side of the cake at about a 45-degree angle and slowly rotate the turntable to sweep away the excess, leaving a very thin, rough coat behind. You should be able to see the cake through this layer — that is correct.
- Refrigerate the crumb-coated cake for 20–30 minutes until the buttercream has firmed up. Once set, it provides a solid base for the final coat.
Why refrigerating matters: A set crumb coat creates a physical barrier between the cake crumbs and the outer buttercream. When you apply the final layer to a firm, chilled surface, the outer coat glides on cleanly without dragging crumbs to the surface.

Step 3: Apply the final coat of buttercream
Once the crumb coat is set, you can apply the final layer. This is where the turntable makes the biggest difference — even, consistent rotation means even, consistent coverage.
- Remove the cake from the fridge and let it sit for 5 minutes. A cake that is too cold will cause the fresh buttercream to firm up too quickly and drag.
- Load your palette knife or offset spatula with a large scoop of buttercream and apply it generously to the top of the cake. Spread outward toward the edges using the rotation of the turntable, keeping your knife at a shallow angle.
- Apply buttercream to the sides. The most efficient method is to hold a loaded palette knife vertically against the side of the cake and rotate the turntable slowly, letting the knife deposit buttercream around the entire circumference in one or two passes. Apply more than you think you need — the scraper will remove the excess.
- Do not try to smooth it at this stage. Just get generous, even coverage all the way around and across the top.
The key mindset at this stage is that more buttercream is always better. The scraper removes excess — it cannot add more. Thin patches in the base coat become thin patches in the finished cake.
Step 4: Use a scraper for a smooth finish
This is the step that produces that clean, sharp, professional look. The scraper does the work — but only when used at the correct angle with consistent pressure.
The scraper angle
Hold your straight-edge cake scraper at approximately 90 degrees to the side of the cake — perfectly vertical, not angled inward or outward. If you tilt it inward (toward the cake), you will scrape away too much buttercream and create a concave side. If you tilt it outward, the scraper bounces and skips, leaving an uneven surface.
The scraping technique
- Press the scraper gently against the side of the cake so it just makes contact with the buttercream surface.
- Hold the scraper completely still — do not move it. Instead, rotate the turntable slowly and steadily with your other hand.
- Let the rotation do the work. The cake moves past the stationary scraper, which shaves the excess buttercream off evenly.
- After one full rotation, lift the scraper, clean it on the edge of your bowl, and make a second pass if needed.
- Repeat until the sides are smooth. Wipe the scraper clean between each pass — a dirty scraper leaves marks.
The top edge
After scraping the sides, you will likely have a small ridge of excess buttercream sitting on the top edge. Use your palette knife to pull this inward across the top of the cake in short, smooth strokes from the edge toward the centre — rotating the turntable as you go. This creates a flat, clean top surface.


Step 5: Create textured finishes with comb scrapers
Once you are comfortable with the smooth finish, comb scrapers open up a wide range of decorative textures that look far more complex than they actually are. A comb scraper is identical to a straight-edge scraper in technique — the only difference is the patterned edge.
How to use a comb scraper
Apply the final coat of buttercream as normal. Then, instead of a smooth straight-edge scraper, press the comb scraper against the side of the cake and rotate the turntable in exactly the same way. The teeth of the comb cut a pattern into the buttercream surface as it passes — zig-zag ridges, wave patterns, sharp geometric lines.
Bakeyy's scraper collection includes a sharp triangle-edge comb scraper for a bold geometric look, and a block-edge scraper for square-notch patterns.
Multi-colour texture technique
To create a textured cake with colour variation, apply the comb scraper pass first, then fill the grooves with a second colour of buttercream using a small spatula or piping bag. Make a final light pass with the straight-edge scraper to level the surface — this reveals the second colour in the grooves while leaving the base colour on the high ridges, creating a two-tone striped effect.
Step 6: Add finishing touches
A smooth frosted cake is complete on its own, but a few finishing elements elevate it into something memorable.
Piped borders and decorations
Use a piping bag fitted with a nozzle from Bakeyy's nozzle set collection to pipe a border around the top and bottom edges of the cake. A simple shell border at the base hides any imperfections where the cake meets the drum board and gives the whole cake a polished, intentional finish.
Cake toppers and candles
A cake topper placed on the freshly frosted top or candles pressed in before serving give the cake its final character. These are applied after the full frosting is complete and the cake has been transferred from the turntable to the serving board.
Sugar confetti and sprinkles
Press sugar confetti or sprinkles lightly into the fresh buttercream on the sides or top before it sets. This is easiest with the cake still on the turntable — rotate slowly while pressing confetti in with your fingertips or a palette knife for even distribution.
Cake stencils
Hold a cake stencil against the frosted side or top and dust or apply a contrasting buttercream colour through the openings. The flat, even surface created by the turntable and scraper is exactly what makes stencils work cleanly — any bumps or ridges in the frosting will bleed the design.


Troubleshooting common problems
My buttercream is pulling and dragging crumbs to the surface
The crumb coat was not set firmly enough before the final coat went on. Return the cake to the fridge for a further 15–20 minutes and try again. Also check that your buttercream is at the right consistency — buttercream that is too stiff drags when spread, and buttercream that is too soft will not hold its shape after scraping. For most cakes, buttercream at room temperature should be smooth and spreadable but hold a peak when you lift the spatula.
My cake sides are concave (curving inward)
The scraper is angled inward instead of held vertically at 90 degrees. Reset the scraper to a perfectly vertical position and make a corrective pass, applying a little extra buttercream to the concave area first. Apply firm, consistent pressure — but not so much that the scraper flexes.
My cake has ridges or horizontal lines on the sides
The turntable is spinning unevenly or too fast. Try rotating more slowly and steadily. Also check that the cake is level on the drum board — if the cake is tilted, the scraper will naturally cut deeper on one side of each rotation, creating a visible line.
My top edges are not sharp
Sharp top edges come from excess buttercream on the top rim being pulled inward after the sides are done — not from scraping the top itself. After scraping the sides, use your palette knife to pull the residual buttercream from the rim inward toward the centre of the top in short, confident strokes. Work around the whole rim systematically. For very sharp 90-degree edges, the flexible D-shaped scraper gives you a curved edge profile that some bakers find easier to control for clean corner definition.
My turntable wobbles during scraping
Check that the counter surface is level and dry, and that the drum board is anchored to the turntable with a dot of buttercream. For plastic turntables, placing a damp cloth or non-slip mat under the base can eliminate any residual movement.
Plastic vs stainless steel vs electric: which turntable is right for you?
This is the most common question from home bakers who are buying their first turntable, and the answer depends primarily on how often you bake and what kind of cakes you make.
A plastic turntable is the right starting point if you are still developing your technique. It is affordable, lightweight, and easy to clean. The limitation is that lighter plastic turntables can be pushed sideways when applying firm scraper pressure — this is manageable, but something to be aware of.
A stainless steel turntable is the right choice once you are frosting cakes regularly and want a tool that performs consistently every time. The extra weight provides stability under scraper pressure and the rotation is smoother. The 10-inch and 12-inch stainless steel options at Bakeyy are designed for Indian home kitchens where kitchen counter space and portability both matter.
An electric turntable is a genuine upgrade for anyone who struggles with the coordination of spinning the table and holding the scraper simultaneously. Since both hands are free, you can hold the scraper in one hand and guide the buttercream application with the other — the same way a professional decorator works. It is also excellent for photography and product display, since the steady rotation creates smooth, professional-looking video content of finished cakes.
Browse the full turntable collection at Bakeyy — plastic, stainless steel, and electric options are all available with free shipping on orders above Rs. 1500.

Related tools that work alongside a turntable
A turntable is most effective when paired with a few supporting tools. These are the ones worth having before your first frosting session:
- Cake base / drum board: Cake bases from Bakeyy sit between the turntable and the cake, make transfer easier, and give your finished cake a professional presentation surface.
- Piping bags: Piping bags allow you to apply buttercream to the sides and top more precisely, reducing the amount of spreading and smoothing required.
- Nozzle sets: Bakeyy's nozzle set collection gives you the tips needed for borders, swirls, rosettes, and detailed top decorations.
- Cake stencils: Cake stencils work best on a turntable because you can rotate the cake slowly while holding the stencil in place for pattern continuity.
- Cake toppers: Once the frosting is complete, cake toppers are the finishing element that personalises the cake for birthdays, weddings, or celebrations.
Frequently asked questions
Do I need a turntable to frost a cake?
No — cakes were frosted long before turntables existed. But a turntable dramatically improves the evenness and efficiency of the process, particularly for the side finish. Once you have used one, returning to freehand frosting feels unnecessarily difficult.
What is the best buttercream consistency for a smooth finish?
Buttercream for smooth frosting should be soft enough to spread without tearing the crumb coat, but firm enough to hold its shape after the scraper passes. If the buttercream is too stiff, it will drag and pull. If it is too soft, the scraper will not leave a clean edge. Room temperature buttercream, beaten until completely smooth and lump-free, is the correct starting point. You can adjust consistency by adding a small amount of cream to loosen it, or chilling the bowl briefly to firm it up.
How do I move the cake from the turntable to the serving plate?
This is one of the main reasons to use a cake drum board — you slide the board off the turntable with the cake on it, then transfer the drum to your serving plate or presentation stand. If you frosted directly onto the turntable without a board, use a wide offset spatula or a flat cake lifter to slide beneath the cake and transfer it in one smooth movement.
Can I use a turntable for cupcakes?
A turntable is useful for cupcakes when applying smooth frosting with a palette knife, but it is less essential than for whole cakes. For displaying cupcakes at parties or events, Bakeyy also stocks cupcake stands that serve as both a display and working platform.
How do I clean a cake turntable?
Wipe down with a damp cloth immediately after use while buttercream residue is still soft. For stainless steel turntables, a mild dish soap and warm water clean the surface without damaging the metal. Avoid submerging the bearing mechanism (the central rotating joint) in water — this will rust the bearing over time. For plastic turntables, all parts can be washed normally. Allow to dry completely before storage.
Can I use a turntable for ganache and cream cheese frosting?
Yes. The turntable and scraper technique works with any spreadable frosting — buttercream, ganache, cream cheese frosting, whipped cream, and even fondant smoothing. The key variable is working temperature: ganache should be at a pourable but not runny consistency (usually around 30–32°C) before going on the cake. Cream cheese frosting should be used at room temperature rather than straight from the fridge.
Summary: the full turntable frosting workflow
- Anchor a cake drum board to the turntable with a dot of buttercream
- Anchor the cake to the board the same way
- Stack layers with buttercream between each, levelling as you go
- Apply a thin crumb coat to all surfaces — top and sides
- Refrigerate for 20–30 minutes until the crumb coat is firm
- Apply a generous final coat of buttercream to all surfaces
- Hold the scraper vertically at 90 degrees and rotate the turntable to smooth the sides
- Pull the top-edge excess inward across the top with a palette knife
- Add piped borders, toppers, confetti, or stencil work to finish
- Transfer the cake on its drum to a serving plate or cake box
All the tools you need — turntables, scrapers, piping bags, nozzle sets, cake bases, toppers, and packaging — are available at Bakeyy.com at wholesale prices with free shipping on orders above Rs. 1500.