Making homemade chocolate bars is one of the most satisfying things you can do as a home baker. You control every ingredient, choose your own flavours, design the shape, and end up with something that looks — and tastes — genuinely professional. Best of all, it does not require an expensive setup. With a good chocolate compound and the right silicone mould, you can make your first batch of homemade chocolate bars in under an hour.
This guide covers everything you need to know: which chocolate to use, how to melt it correctly, how to fill your moulds without air bubbles, how to add fillings, and how to get that clean unmould every single time. Whether you are making bars for yourself, for gifting, or to sell as a home baker, this tutorial will get you there.

What you will need
Before you begin, gather your equipment and ingredients. Here is the complete list:
Equipment
- A silicone chocolate mould — bar shape, multi-cavity, or lollipop style
- A microwave-safe glass or ceramic bowl (for melting)
- A silicone spatula or spoon
- A small ladle or piping bag for filling the mould
- A flat baking tray or chopping board to rest the mould
- A refrigerator
Ingredients
- 200–300g of chocolate compound (dark, milk, or white)
- Optional fillings: chopped nuts, dried fruit, rice crisps, caramel, or chocolate spreads
- Optional: oil-based food colours for white chocolate decoration
That is genuinely all you need. No thermometer, no marble slab, no professional equipment.
Step 1: Choose the right silicone mould
The shape of your mould determines the final look of your bar, so this choice is worth thinking about. Bakeyy stocks a wide range of chocolate moulds suited to beginners and experienced makers alike.
Bar moulds (single cavity)
These are large, rectangular moulds that produce one full-sized bar per cavity. They are the best starting point for beginners because the large surface area is easy to fill and the bars unmould cleanly. The Classic Grid Chocolate Bar Mould gives you the instantly recognisable segmented bar look. The Chunky Square Grid Bar Mould produces a thicker, chunkier bar — ideal if you are adding fillings.
Multi-cavity moulds
These make 6, 10, or 15 individual pieces in a single pour. They are perfect for making chocolates in batches — great for gifting, party favours, or retail. Shapes available include hearts, flowers, teardrops, stars, and festive designs like the Modak Shape Mould — ideal for Ganesh Chaturthi chocolate gifts.
Lollipop moulds
These are multi-cavity moulds with built-in stick channels. They produce chocolate lollipops, which are popular for children's birthday parties and gift hampers. The Daisy Flower Lollipop Mould is a beginner favourite.
Tip for beginners: Start with a single-cavity bar mould. Once you are comfortable with filling and unmoulding, move on to multi-cavity designs.


Step 2: Choose the right chocolate
This is the most important decision in the entire process. The type of chocolate you use determines whether your bars set firm, release cleanly from the mould, and have a good snap.
Compound chocolate vs couverture: what is the difference?
Compound chocolate has cocoa butter replaced fully or partly with vegetable fat (usually palm or coconut). This makes it easy to work with because it melts smoothly, sets at room temperature or in the fridge, and does not require tempering. For beginners making moulded bars at home, compound chocolate is the correct choice.
Couverture chocolate contains a minimum percentage of real cocoa butter (listed on the packaging). It produces superior gloss, snap, and flavour — but it requires proper tempering to achieve those results. Skipping tempering with couverture results in a dull, streaky, soft bar.
If you are new to chocolate making, start with compound. Once you have mastered the moulding process, you can explore couverture and tempering as a separate skill.
Dark, milk, or white?
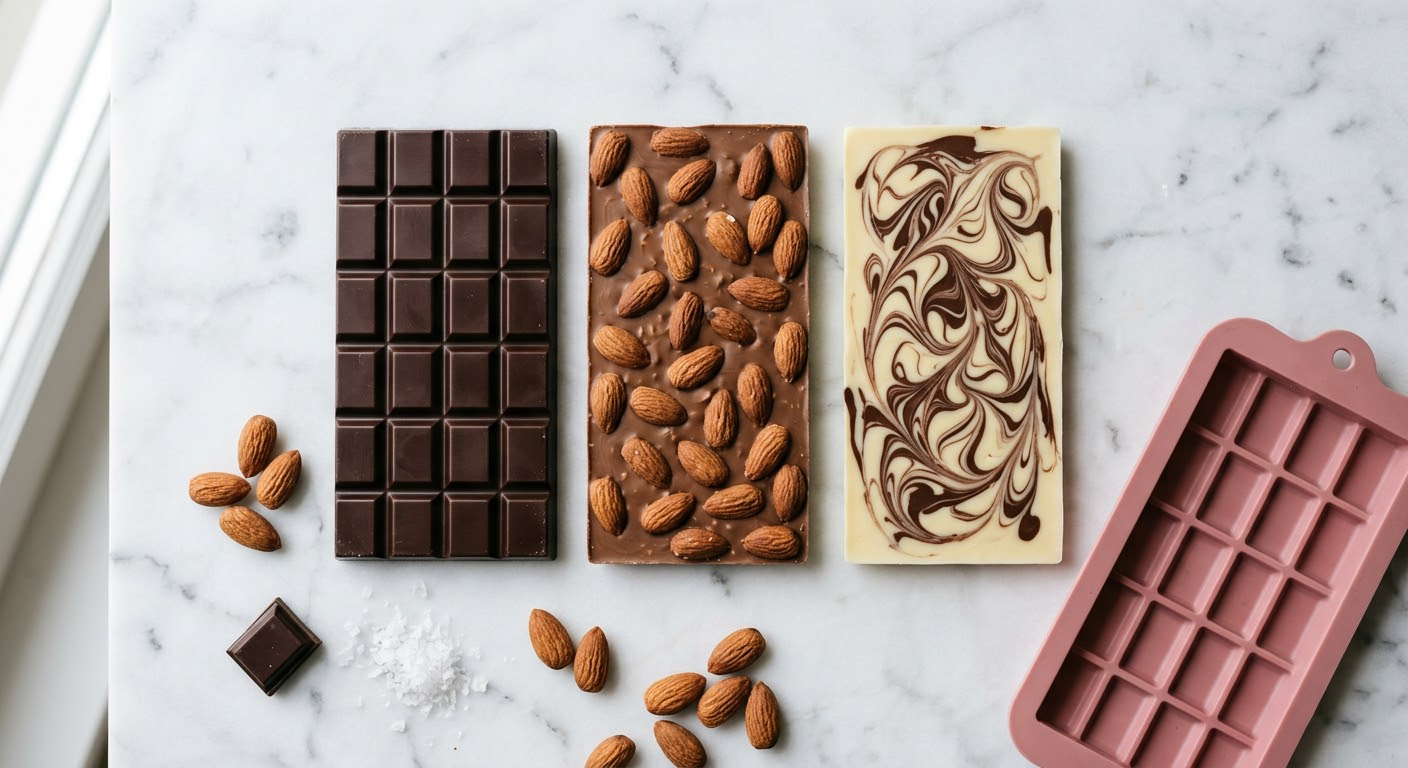
- Dark compound — sets the firmest, has the lowest melting point, and produces the most defined mould details. Morde Dark Compound (500g) and 2M Dark Chocolate Compound CP11 (500g) are reliable, widely used options among Indian home bakers.
- Milk compound — slightly sweeter, sets a little softer than dark. Morde Milk Compound and 2M Milk Chocolate Compound are popular choices for everyday bars and gifts.
- White compound — the most temperature-sensitive of the three. It sets soft at room temperature and needs refrigeration. It is also the most versatile for colour work — you can add oil-based food colours directly to melted white compound to create pastel or vivid coloured bars.
Browse Bakeyy's full range of compounds and couverture chocolates, including brands like Morde, 2M, Van Houten, Micks, and Callebaut.


Step 3: Melt the chocolate correctly
Improper melting is the most common reason homemade chocolate bars turn out grainy, lumpy, or seized. Here is the correct method for compound chocolate.
The microwave method (recommended for beginners)
- Chop or break the chocolate into small, even pieces. Smaller pieces melt more evenly. For a standard bar mould, 150–200g is usually enough for one pour.
- Place in a completely dry, microwave-safe bowl. Any water in the bowl will cause the chocolate to seize — become a thick, grainy paste that cannot be rescued. Both the bowl and your spatula must be bone dry.
- Microwave at 50% power in 30-second intervals. After each interval, remove and stir. Do not skip the stirring — the chocolate continues to melt from residual heat even after you remove it from the microwave.
- Stop when most of the chocolate is melted but a few small lumps remain. Stir until those lumps dissolve from the residual heat. If you microwave until completely smooth in one go, you have likely overheated it.
- Correctly melted chocolate should be smooth, fluid, and fall off the spatula in a thick ribbon. It should not be steaming or smell burnt.
The double boiler method
If you prefer more control: place a heatproof bowl over a saucepan of barely simmering water. The bowl must not touch the water. Stir continuously until melted. Never melt chocolate over direct flame — it will scorch almost immediately.
Working temperature for compound chocolate
Compound chocolate does not require precise tempering, but performs best at around 40–45°C for dark and milk, and 35–40°C for white. You do not need a thermometer — the chocolate should feel slightly warm (not hot) when you test a drop on the inside of your wrist.
Step 4: Fill the mould
Place your silicone mould on a flat chopping board or baking tray. Silicone moulds do not need greasing — chocolate releases cleanly without any oil or spray. Make sure the mould is clean, dry, and at room temperature before filling.
Pour the melted chocolate into each cavity, filling to just below the rim. Alternatively, use a piping bag for more precise filling, especially with small multi-cavity moulds.
Once filled, tap the mould firmly on the table several times to bring trapped air bubbles to the surface. Run a toothpick through each cavity to pop any visible bubbles — this step is especially important for grid-pattern bar moulds.

Step 5: Add fillings (optional)
Method 1: Direct mix-ins
Stir your filling directly into the melted chocolate before pouring. Works well for roasted nuts (almonds, cashews, pistachios), rice crisps, and dried fruit (cranberries, raisins). Keep the ratio to roughly 20–25% of the chocolate weight.
Method 2: Press-in after pouring
Pour the chocolate first, then immediately press inclusions into the surface before it sets. Good candidates: whole nuts, sea salt flakes, and sugar confetti and sprinkles.
Method 3: Two-layer method for filled bars
For bars with a soft filling in the centre — ganache, caramel, or hazelnut spread:
- Fill each mould cavity about one-third full. Tap out air bubbles.
- Refrigerate for 8–10 minutes until the chocolate has set but is not fully hardened.
- Add a small amount of filling to the centre of each cavity, keeping it away from the edges.
- Pour a second layer of melted chocolate over the top to seal the filling completely.
- Tap again to level, then refrigerate to set fully.
The key: filling must not touch the sides of the cavity, or the bar will not seal and the filling will leak during unmoulding.
Step 6: Set the chocolate
Place the filled mould flat on a tray and transfer to the refrigerator. Do not stack anything on top.
- Dark compound: 15–20 minutes
- Milk compound: 20–25 minutes
- White compound: 25–30 minutes (sets softer, needs longer)
- Filled bars: 30–40 minutes for the shell, then 20 minutes after sealing
The chocolate is ready when the surface looks fully matte (not shiny in the centre) and the mould feels uniformly cold.
Compound chocolate will set at room temperature if your kitchen is below approximately 28°C. In Indian summers or the monsoon, refrigeration is the safer option. Avoid the freezer — rapid temperature change causes condensation and bloom on the chocolate surface.
Step 7: Unmould cleanly
- Remove the mould from the fridge and let it sit at room temperature for 2–3 minutes.
- For bar moulds: gently flex the mould from the back, pushing the centre upward. The bar will pop free.
- For multi-cavity moulds: work from one end, pressing each cavity from the back. Pieces release one at a time.
If a bar is sticking, the chocolate has not fully set. Return to the fridge for another 10 minutes and try again. Never force a pull — always flex and push from underneath.
White marks or dull surface (bloom): Fat bloom is caused by inconsistent setting temperatures. It does not affect taste. Set at a steady fridge temperature (4–6°C) and avoid opening the fridge mid-set to minimise this.

Step 8: Colour your chocolate (optional)
Adding colour to white chocolate lets you create vivid, pastel, or ombre bars with very little extra work. You must use oil-based or powder food colours — water-based liquid colours will cause white compound to seize immediately.

Browse the full food colours collection and check the product description to confirm the type before purchasing for chocolate use.
Marble and swirl effect
Melt dark and white compound separately. Pour white into the mould, then immediately add drops of melted dark. Swirl with a toothpick, tap, and refrigerate. The result is a vivid two-tone bar that requires no special equipment.
Step 9: Package your bars
Wrap individual bars in chocolate wrapping paper or foil wrappers — fold the ends neatly and seal with a sticker. For gift sets, place bars in a chocolate box lined with shredded paper filler, add a ribbon and a gift tag.


Bakeyy's full baking packaging supplies collection has everything you need at wholesale prices.
Troubleshooting common problems
My chocolate seized and turned grainy
Water got into the melted chocolate. Even a single drop — from a damp bowl, wet spatula, or steam — causes seizing. Once seized, compound cannot be recovered for moulding. Discard it, ensure all equipment is completely dry, and start again.
My bars have white streaks or a dull, chalky surface (bloom)
Fat bloom is caused by inconsistent setting temperatures. Set at a steady 4–6°C and avoid opening the fridge while setting. Does not affect taste.
My bars cracked when unmoulding
The chocolate was chilled too rapidly (avoid the freezer), or the mould was pulled rather than flexed. Let bars warm slightly at room temperature before flexing gently from underneath.
The surface is not glossy
Compound will never achieve the mirror shine of tempered couverture — this is normal. For improved gloss, ensure the mould is clean and dry before filling, and avoid overheating. Adding approximately 1 tsp of vegetable shortening per 200g of compound can improve fluidity and surface finish.
My fillings leaked during unmoulding
The seal layer was too thin or the filling touched the mould edges. The seal layer needs to be at least 3–4mm thick, and filling must stay at least 3mm away from all sides of the cavity.
Mould shapes available at Bakeyy
- Classic bar moulds: Grid, chunky square grid, micro square grid, woven pattern, curved wave design
- Mini chocolate piece moulds: Hearts, teardrops, flowers (daisy, rose, petal), stars, mushrooms, strawberries, geometric faceted shapes, modak
- Lollipop moulds: Daisy flower, smiley face — with stick channels built in
- Specialty moulds: Number shapes (0–9), swan and rose heart, scalloped shell and starburst, donut ring, geometric bubble cube


Prices start from Rs. 69 per mould. Browse the complete chocolate mould collection to find shapes that work for your style.
Your first batch: dark almond chocolate bars
Makes: 2–3 single-cavity bars | Time: 15 minutes active + 20 minutes setting
Ingredients
- 200g dark chocolate compound (Morde or 2M CP11)
- 40g roasted almonds, roughly chopped
- Pinch of sea salt (optional)
Method
- Chop compound into small pieces. Melt in the microwave at 50% power in 30-second intervals, stirring between each, until smooth.
- Stir in chopped almonds and salt.
- Pour into a clean, dry silicone bar mould on a flat tray.
- Tap the tray firmly on the counter 5–6 times to release air bubbles.
- Refrigerate for 20 minutes.
- Remove from fridge, rest 2 minutes, then flex the mould to release.
- Wrap in chocolate wrapping foil or place in a chocolate gift box.
What to explore next
- Bonbons and truffles: Bakeyy's entremeé moulds for dome-shaped filled chocolates
- Popsicle chocolates: Popsicle moulds for chocolate lollies with mixed fillings
- Couverture and tempering: Morde, Van Houten, and Callebaut couverture chocolates for professional-grade results
- Coloured chocolate work: White compound + oil-based food colours for vivid multi-coloured bars

All supplies — moulds, chocolate compounds, food colours, and packaging — are available at Bakeyy.com at wholesale prices with free shipping on orders above Rs. 1500.
Frequently asked questions
Do silicone moulds need to be greased before use?
No. Provided the chocolate is fully set, it releases cleanly from silicone without any greasing. Adding oil can leave residue on the chocolate surface and affect the finish.
Can I use any chocolate bar from the supermarket?
Store-bought eating chocolate is formulated for eating, not moulding — it often contains emulsifiers and additives that make it behave unpredictably when melted. Purpose-made baking compounds give consistently better results.
How long do homemade chocolate bars last?
Compound bars without fresh fillings last 3–4 weeks at room temperature (below 28°C) or up to 3 months refrigerated if wrapped properly. Bars with ganache or cream fillings should be refrigerated and consumed within 5–7 days.
Can I reuse the same mould for different chocolates?
Yes. Clean with warm water and a soft cloth after each use. Avoid abrasive scrubbers. Dry completely before reuse — any moisture will cause the next batch to seize.
What is the minimum I need to get started?
A 500g block of compound chocolate and one silicone mould is enough for multiple batches. Bakeyy's compounds start from 500g and moulds from Rs. 69 — making it one of the most affordable skills to get into as a home baker.
1 thought on "How to Make Homemade Chocolate Bars with Silicone Moulds: A Complete Beginner's Guide"
How to pack and sell, does chocolate melting during transit? What’s do and don’ts for fresher in chocolate making business?