

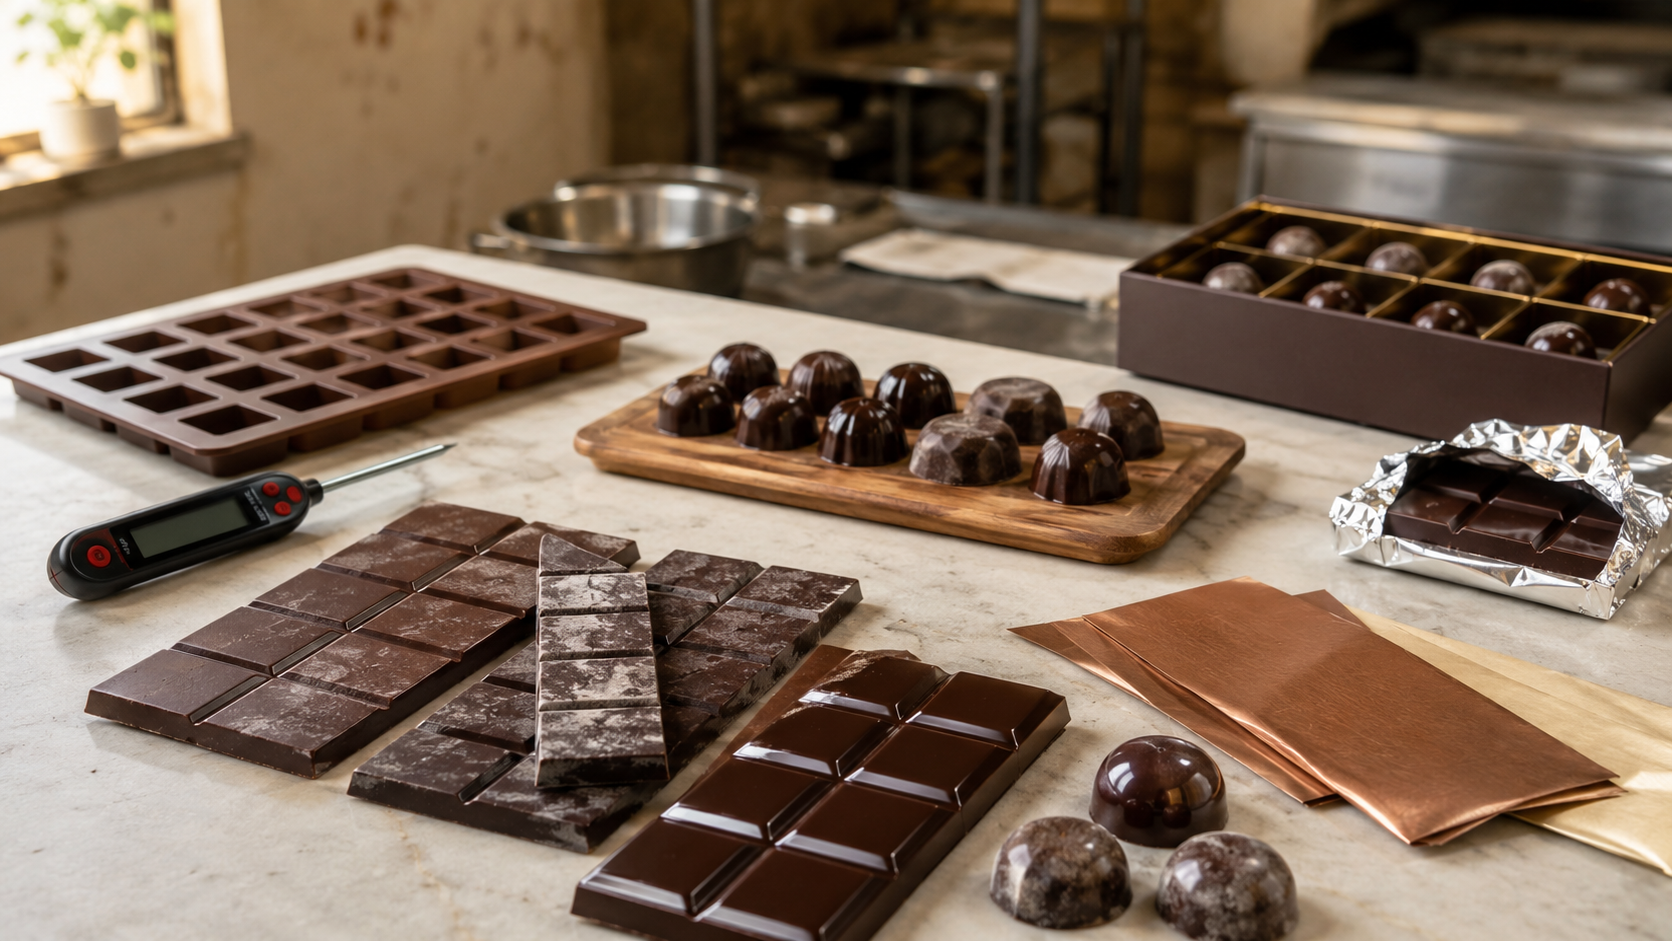
If a batch of chocolates leaves your mould glossy and dark but develops pale streaks, grey patches or a dusty white surface a day later, changing the chocolate brand should not be your first reaction.
You first need to work out what kind of bloom you are looking at.
Fat bloom and sugar bloom can look similar from a distance, but they happen for different reasons. One is largely a fat-crystallisation and temperature problem. The other is a moisture problem. Treating both as simply "chocolate turned white" is why bakers often repeat the same mistake across several batches.
This matters even more when you are making chocolates commercially in India. A batch may move from an air-conditioned room to a warm packing table, into a refrigerator, back into room temperature, then into a delivery vehicle. During monsoon, moisture introduces another variable. Filled chocolates add yet another complication because fats from nut, praline and other centres can migrate towards the shell.
So the useful question is not just, "Why did my chocolate bloom?" It is: what happened to this particular batch between melting, moulding, setting, storage, packing and delivery?
Quick answer: why does chocolate turn white?
A white or grey coating on chocolate is commonly caused by either fat bloom or sugar bloom.
Fat bloom is connected with changes in the fat structure of chocolate. Poor tempering, temperature fluctuations, inappropriate cooling and fat migration from fillings can all contribute. Research on chocolate fat crystallisation identifies tempering and storage conditions as major factors in bloom formation.
Sugar bloom is moisture-related. When condensation or humidity reaches the chocolate surface, some sugar can dissolve. When the moisture disappears, that sugar recrystallises on the surface and can leave a rough, pale or dusty-looking layer. Chocolate Academy specifically identifies humidity as the common factor behind sugar bloom.
| What you notice | More likely cause | What to investigate first |
|---|---|---|
| Grey or whitish streaks, cloudy patches, loss of gloss | Fat bloom | Tempering, cooling and temperature fluctuations |
| Dry, dusty, rough or grainy-looking surface after condensation | Sugar bloom | Humidity, refrigerator handling and moisture |
| Bloom mainly on filled chocolates | Possible fat migration | Filling formulation, shell and storage |
| Chocolate looked good initially but changed after delivery | Temperature or moisture exposure | Transit conditions and packaging |
| Chocolate is dull immediately after unmoulding | Tempering or mould/process issue may be more likely | Chocolate type, tempering and mould condition |
That table is a diagnostic starting point, not a laboratory test. Mixed bloom can occur, so use the appearance together with the batch history rather than diagnosing from colour alone. Research using Raman analysis has identified samples containing characteristics of both fat and sugar bloom.
What actually is chocolate bloom?
Chocolate bloom is a physical surface defect that changes the appearance and sometimes the texture of chocolate.
For a baker, the easiest way to think about it is that the smooth structure you created while making the chocolate has changed.
With fat bloom, the change happens in the fat phase. With sugar bloom, moisture interferes with the sugar at the surface.
Chocolate Academy separates physical shelf-life changes such as fat bloom, sugar bloom and moisture absorption from microbial spoilage such as mould, yeast and bacterial growth. That distinction is important. A pale surface is not automatically proof of microbial spoilage, but you also should not automatically classify every strange surface as harmless bloom when you do not know the product's storage history.
If you see actual mould growth, damaged packaging, an unusual smell, obvious wet contamination or another sign that does not look like ordinary bloom, treat that as a separate food-quality or food-safety issue rather than assuming it is merely crystallisation.
What is fat bloom?
Fat bloom usually appears as a dull grey, whitish or cloudy film, streaking or irregular patches on the chocolate surface.
To understand why it happens, you need one small piece of chocolate science.
Cocoa butter can crystallise in several different forms. The internal arrangement of those crystals affects gloss, snap, melting behaviour and stability. Proper tempering is designed to encourage a desirable stable crystal structure. Research into cocoa-butter polymorphism identifies the form commonly called Form V as particularly important for the gloss and snap associated with well-tempered chocolate.
When that fat structure changes, particularly through poor tempering or unsuitable storage conditions, fat can recrystallise in ways that make the surface appear pale or cloudy. Temperature fluctuation is a major part of the problem.
This is why a chocolate can look good when you first unmould it and still bloom later.
The manufacturing step may have created a batch that was only temporarily stable, or the batch may have been correct when produced but exposed to damaging temperature cycles afterward.

What causes fat bloom?
There is no single cause that explains every bloomed chocolate. Think of fat bloom as the result of a process becoming unstable somewhere between production and consumption.
The most useful causes for a small chocolate business to investigate are these.
1. Incorrect tempering. If couverture is not properly pre-crystallised, you can end up with poor gloss, weak contraction, soft texture, streaking or bloom. Callebaut describes tempering as controlling temperature while establishing a stable cocoa-butter crystal structure; for moulding and enrobing, it considers tempering essential.
2. Temperature fluctuations after production. Chocolate dislikes repeated warming and cooling. A finished box sitting comfortably in an air-conditioned kitchen can later spend time near a warm loading area, then enter another cooled environment. Even if the chocolate never turns into a puddle, those temperature changes can still damage its surface stability.
3. Incorrect cooling. Cooling is not simply "make the chocolate as cold as possible." You are trying to set the chocolate predictably without creating unnecessary condensation or aggressive temperature cycling.
4. Fat migration from fillings. Filled pralines and bonbons introduce fats that may behave differently from cocoa butter. Research on nougat-filled pralines has demonstrated migration of oils from fillings into the surrounding chocolate and links that migration with fat-bloom stability.
5. Long-term structural change. Even correctly tempered chocolate is not frozen in time. Cocoa-butter crystals can continue changing during storage. The goal of good production and storage is to make those changes as controlled and slow as practical.
What is sugar bloom?
Sugar bloom is the moisture side of the problem.
Imagine you take a cold chocolate box from the refrigerator and immediately open it in a warm, humid room. Moisture from the air can condense on the cold chocolate.
That water can dissolve a very small amount of sugar at the chocolate surface. After the water evaporates, the sugar is left behind as crystals. Instead of the original smooth surface, you may see a pale, dusty or grainy finish.
Chocolate Academy's troubleshooting guidance is very direct here: sugar bloom is related to humidity. Its storage guidance also warns that condensation when cold chocolate is returned to room temperature can result in sugar bloom.
This is why "keep it in the fridge" is not a complete chocolate-storage strategy.
A refrigerator may solve one problem — an overly warm room — while creating another if the product is repeatedly moved in and out or opened before it has warmed inside its sealed packaging.
How can I tell fat bloom from sugar bloom at home?
You will not reproduce laboratory analysis in a bakery, but you can make a much better diagnosis by combining appearance, texture and batch history.
| Clue | Fat bloom | Sugar bloom |
|---|---|---|
| Typical trigger | Tempering, fat migration, heat or temperature cycling | Moisture, humidity or condensation |
| Appearance | Cloudy, grey, streaky or marbled | Dusty, pale, rough or grainy |
| Surface feel | May still feel relatively smooth | Often feels noticeably rougher |
| Common story | "It looked fine yesterday, then developed streaks." | "It came out of the fridge and started sweating." |
| First process to check | Tempering and temperature control | Cold-to-warm handling and moisture protection |
One scientific study used the different responses of fat and sugar bloom to heat and water as part of its characterisation, but that does not mean we recommend dripping water onto saleable chocolates as a bakery test. Record the batch history instead.
If the chocolates were exposed to visible condensation, sugar bloom moves higher on your list. If they remained dry but experienced poor tempering or repeated heat changes, investigate fat bloom first.
Does compound chocolate bloom too?
Do not apply couverture troubleshooting blindly to compound chocolate.
Couverture relies heavily on cocoa butter, which is why tempering and cocoa-butter crystallisation are central to its behaviour. Compound chocolate uses other fats and is designed to be easier to melt, set, mould and coat without the same tempering process.
For example, the live Bakeyy listing for Van Houten Professional Compound | Dark, Milk & White | 500g specifically states that no tempering is required and recommends storing the product in a cool, dry place away from sunlight, moisture and strong odours.

That does not mean compound chocolate is immune to surface defects. Heat, poor storage, moisture and incompatible fats can still produce disappointing results. It simply means that if a compound batch develops a white surface, shouting "bad temper" is not a useful diagnosis because the product was not supposed to be tempered like couverture in the first place.
If you are still deciding which category suits your production, read our compound vs couverture guide before troubleshooting the process.
How should couverture chocolate be tempered?
There is one rule we would put above every generic temperature chart: check the manufacturer's crystallisation curve for the exact chocolate you are using.
Dark, milk and white chocolates do not necessarily use identical working temperatures, and even products within one category can differ.
As a real example, Callebaut publishes the following curves for three of its products:
| Callebaut example | Melt to | Cool to | Warm to / working range |
|---|---|---|---|
| 811 Dark | 45–50°C | 27°C | 31–32°C |
| 823 Milk | 45°C | 27°C | 29–30°C |
| W2 White | 45°C | 27°C | 28–29°C |
These are Callebaut-specific examples, not universal temperatures for every couverture brand. Callebaut publishes them in its official tempering guidance.
If your supplier gives you a different curve for another couverture, use that product's instructions.
A thermometer is one of the cheapest ways to remove guesswork from this stage. "It feels warm" may be acceptable when simply melting an easy compound for a casual dessert. It is a weak production system when you are making hundreds of tempered bonbons that need to look the same three days later.
Why mould condition matters more than people think
When a moulded chocolate comes out dull, bakers often immediately blame the chocolate.
Check the mould too.
It should be clean, fully dry and suitable for the chocolate you are producing. Residue and water are especially problematic when your goal is a clean glossy surface.
Chocolate Academy includes dirty moulds and residue among the problems to check when troubleshooting poor chocolate surfaces and sugar bloom.

For a production kitchen, we would treat mould preparation as a checklist rather than something done casually:
- Check every cavity for old chocolate or oily residue.
- Make sure no wash water remains in corners or details.
- Keep moulds away from steam while you are working.
- Do not keep changing mould preparation methods between batches.
- Record which mould was used if a surface defect appears repeatedly in only one design.
That last point can save hours. If ten moulds from the same chocolate batch are glossy and one tray is dull, the chocolate may not be your main problem.

What is the best temperature for storing finished chocolate?
For finished pure chocolate, Chocolate Academy recommends storage between 12°C and 18°C, away from light, drafts and strong odours. It also recommends airtight packaging where possible.
That recommendation exposes the real difficulty for many Indian home bakers: your kitchen may not naturally sit in that range for large parts of the year.
The solution is not to pretend room temperature means the same thing everywhere.
In a Bengaluru kitchen during a mild period, your storage challenge may be manageable with a cool internal room. In a hotter production environment, you may need controlled cooling. During monsoon, the conversation shifts towards condensation and humidity control as well.
If your business is becoming serious about couverture, temperature-controlled storage stops being a fancy upgrade and starts becoming part of process control.
Should chocolate be stored in the refrigerator?
Ideally, finished chocolate should not spend its life moving repeatedly between a refrigerator and a warm room.
Chocolate Academy generally advises against refrigeration for confectionery when better controlled storage is available because refrigerator moisture and the cold-to-warm transition create additional risks.
But there is a practical reality: some Indian home bakers do not have a 12–18°C storage room.
If refrigeration is unavoidable, the most important part is how you move the chocolate back out.
Keep the chocolate sealed while it warms.
Do not take a cold unwrapped bar or open bonbon box straight from the fridge into humid kitchen air and start arranging it immediately. The colder chocolate surface encourages condensation.
Instead, keep the product properly wrapped or sealed and let the package approach room temperature before opening. Chocolate Academy explicitly recommends allowing packaged chocolates to return to room temperature before opening the packaging.
This one habit can prevent a surprising amount of sugar-bloom trouble.
How should chocolates be packaged to reduce bloom problems?
A gift box is not automatically a moisture barrier.
This distinction matters.
The attractive outer box solves presentation, organisation and some physical-protection problems. Your primary wrap or sealed inner pack solves a different problem: isolating the chocolate from moisture, odours and the surrounding environment.
Chocolate Academy recommends airtight packaging that also protects from light where possible, using sturdy, odour-free materials.
So if you sell individual bars, wrap the bar properly first and then think about decorative presentation.

One detail on our Matt Chocolate Wrapper | Pack of 200 listing is worth paying attention to: the page advises using a proper food-safe inner wrapping when chocolates will come into direct contact with the packaging.
That is the better way to think about packaging generally. Do not decide that a material is the primary food-contact layer simply because it looks like a chocolate wrapper.
What about cavity chocolate boxes?
Cavity boxes are excellent for another problem: movement control.
When chocolates slide into one another, you can get scuffing, cracking, fingerprints and damaged decoration even if the chocolate itself is perfectly tempered.
For example, our Three Cavity Transparent Chocolate Box is a 12 × 4 × 4.5 cm transparent PET format with three removable cavity inserts. The cavities keep individual pieces separated.

But the product page does not claim that this box is airtight, so we would not treat the cavity box itself as proof of moisture protection. That is an important distinction.
If your product needs a sealed primary barrier for storage, use the cavity box as the secondary presentation and movement-control layer rather than asking it to perform a job it was never specified to perform.

How should you handle chocolate during Indian summer?
Summer chocolate problems are often treated like a packaging problem when they are really a temperature-chain problem.
You can put an unstable chocolate inside an expensive box and still receive a customer complaint.
Start before packing:
- Produce the chocolate under controlled conditions.
- Allow it to crystallise and stabilise properly.
- Wrap or seal it before it encounters uncontrolled humidity.
- Keep packed stock away from direct sunlight and hot storage areas.
- Reduce the time orders spend waiting in non-controlled dispatch areas.
- Plan delivery timing around the product rather than convenience alone.
If a product cannot reasonably survive your chosen delivery route, change the delivery system or change the product.
For a short local order, you have far more control over dispatch timing than you do with an interstate courier network.
For more general hot-weather packaging planning, our existing guide to packaging baked goods in Indian summer covers the wider bakery side of this problem.
What changes during monsoon?
During monsoon, stop thinking only about heat and start thinking about moisture movement.
The risky sequence is straightforward:
cold chocolate → humid air → surface condensation → moisture reaches sugar → sugar recrystallises → rough pale surface.
So our monsoon workflow would focus heavily on sealed handling.
- Do not leave refrigerator doors open while deciding what to pack.
- Do not unpack cold chocolate immediately.
- Keep the production room as stable as practical.
- Avoid steam around chocolate workstations.
- Close unused chocolate and finished stock promptly.
- Keep packaging dry before it reaches the packing table.
A cardboard presentation box stored in a damp room can also become soft or distorted, so packaging storage deserves the same attention as ingredient storage.
Why do filled chocolates bloom faster?
Once you add a filling, you no longer have one simple fat system.
Nut pastes, pralines and similar centres can contain oils that migrate into the chocolate shell over time. Research on filled chocolates has repeatedly studied oil migration as a major contributor to fat-bloom development.
This is why "the shell was tempered correctly" does not close the investigation.
If plain bars made from the same batch remain glossy but your filled pieces bloom, inspect the filling and storage conditions rather than changing the shell process blindly.
For a business, this is also why each SKU should have its own shelf-life and stability testing. A plain dark chocolate tablet and a nut-filled praline should not inherit the same assumptions simply because both contain chocolate.
Chocolate bloom troubleshooting table
| Problem | Most useful first check | What we would change next batch |
|---|---|---|
| White streaks appear a few hours after moulding couverture | Tempering | Use thermometer and exact product curve |
| Chocolate is dull straight from the mould | Tempering + mould condition | Standardise mould preparation and tempering |
| Bars look good before delivery but cloudy afterward | Transit temperature | Review dispatch and delivery chain |
| Surface turns grainy after refrigeration | Condensation | Keep package sealed while warming |
| Only filled pralines bloom | Fat migration | Test filling/shell system separately |
| Only one mould gives dull chocolates | Mould residue or moisture | Clean, dry and inspect that mould |
| Compound chocolate looks pale after storage | Storage and heat exposure | Follow manufacturer's handling instructions rather than couverture tempering advice |
| Chocolate absorbs spice or refrigerator smells | Packaging and storage location | Use sealed packaging and separate from strong odours |
Chocolate bloom prevention scorecard
The following is our editorial production guidance, not laboratory performance testing.
| Control | Importance for fat bloom | Importance for sugar bloom |
|---|---|---|
| Correct couverture tempering | Very High | Low |
| Stable storage temperature | Very High | Medium |
| Humidity / condensation control | Medium | Very High |
| Dry moulds and tools | High | High |
| Airtight primary packaging | Medium | Very High |
| Correct handling of filled centres | Very High | Medium |
| Controlled delivery conditions | High | High |
Can bloomed chocolate be fixed?
If you are dealing with a plain chocolate bar that has developed a cosmetic bloom but has otherwise been stored and handled correctly, remelting and processing the chocolate again may be possible.
For couverture, that means going back through the correct tempering process rather than trying to polish the white marks away.
For compound, follow the melting and handling instructions for that compound rather than putting it through a couverture tempering cycle.
But there is an important commercial distinction between reworking raw chocolate and trying to rescue finished retail stock.
If an entire finished gift order has bloomed, reheating every individual piece is rarely a sensible finishing technique. You have lost the original surface and potentially the decoration, fillings or packaging. Diagnose the cause and decide whether that batch can appropriately be reworked into another product.
Do not wipe bloomed chocolate with water. If sugar bloom is already the result of moisture, adding more water creates another problem.
Should you sell bloomed chocolate?
If you are charging for clean, glossy moulded chocolates, the customer is buying appearance as well as flavour.
A technically edible but visibly bloomed chocolate can still be a failed retail product.
For commercial orders, we would separate three questions:
- Is the product safe and properly handled?
- Does it still meet the intended sensory quality?
- Does it meet the appearance standard you promised the customer?
Those are not the same question.
If a corporate buyer approved glossy bonbons and you deliver grey-streaked chocolates, explaining cocoa-butter polymorphism afterwards does not solve the order.
That is why bloom prevention belongs inside quality control, not only inside recipe development.
Build a chocolate batch record before buying more equipment
When something goes wrong repeatedly, memory is unreliable.
Record the batch.
| Record | Why it matters |
|---|---|
| Chocolate brand + exact variant | Tempering requirements differ |
| Batch / manufacturing details | Helps trace ingredient issues |
| Melt temperature | Shows how the process started |
| Tempering method | Lets you repeat successful batches |
| Working temperature | Identifies process drift |
| Room condition | Adds context for heat/humidity issues |
| Mould used | Helps isolate mould-specific defects |
| Cooling method | Helps identify instability |
| Filling | Important for fat migration |
| Packaging format | Important for moisture and odour protection |
| Storage location | Shows post-production exposure |
| Dispatch and delivery method | Helps identify transit failures |
| When bloom first appeared | Narrows the likely stage of failure |
After four or five properly documented batches, patterns become much easier to see.
If every batch produced above a certain room condition develops problems after delivery, that is useful information. If one filling blooms while every plain bar remains stable, that is useful information. If one employee's batches fail while another employee's batches using the same chocolate remain glossy, your process may not be standardised.
How much does chocolate bloom actually cost a bakery?
Do not measure a failed batch only by the cost of the chocolate.
The more useful formula is:
Failed batch cost = ingredients + filling + labour + packaging already used + electricity + delivery/replacement cost + lost production time
If the customer order has already left, add customer-service time and the possibility of replacement delivery.
We are deliberately not putting invented percentages against those costs because every bakery operates differently.
Track the real number from your own production.
You may discover that spending on a thermometer, controlled storage or better primary packaging is cheaper than repeatedly throwing away visually defective stock.
Our practical chocolate workflow for Indian home bakers
If we were setting up a small chocolate line from scratch, we would make the workflow boringly repeatable.
Step 1: Decide between compound and couverture intentionally.
Do not buy couverture for its name and then treat it like compound. Do not buy compound and waste time tempering it using couverture advice. Start with our compounds and couverture collection and read the exact product information before production.
Step 2: Standardise mould preparation.
Clean. Dry. Inspect. Repeat.
Step 3: Measure instead of guessing when tempering couverture.
Use the manufacturer's crystallisation curve.
Step 4: Keep the working environment stable.
A batch that moves repeatedly between drastically different environments is harder to control.
Step 5: Treat cooling as part of the recipe.
Write down what you do instead of changing the method every batch.
Step 6: Let the chocolate stabilise before rushing into presentation packaging.
Do not make the box look finished before the chocolate itself is stable.
Step 7: Use primary and secondary packaging for different jobs.
The primary layer protects the food. The presentation box organises and presents it. Browse our chocolate wrapping essentials and chocolate boxes with that distinction in mind.
Step 8: Protect against cold-to-warm condensation.
If refrigeration is necessary, warm sealed packages before opening.
Step 9: Test the actual delivery journey.
Do not approve a packaging system solely because it survives two days on your kitchen shelf.
Step 10: Keep a control sample.
For an important commercial batch, keep a sample from the same production run under your normal storage conditions. If a customer reports bloom after delivery while your control remains clean, that tells you something about where to investigate.
Frequently asked questions about chocolate bloom
Why did my chocolate turn white but not melt?
Chocolate does not have to melt into liquid before developing bloom. Fat bloom can develop through crystallisation changes and temperature fluctuations, while sugar bloom can develop after moisture or condensation reaches the surface.
Does white chocolate get chocolate bloom?
Yes, although the visual change can be harder to recognise because white chocolate is already pale. Look for changes in gloss, surface uniformity and texture rather than expecting the same grey-white contrast you see on dark chocolate.
Why does chocolate bloom after refrigeration?
A common reason is condensation when cold chocolate is exposed to warmer humid air. Chocolate Academy recommends allowing packaged chocolate to return to room temperature before opening specifically to reduce this problem.
Why does my tempered chocolate bloom the next day?
Check the entire process rather than assuming that reaching the correct final temperature guaranteed a stable temper. Tempering involves time, temperature, movement and stable crystallisation. Cooling and subsequent storage also matter.
Can packaging stop fat bloom?
Packaging can reduce exposure to heat, moisture, light and odours, but it cannot correct badly tempered couverture. Think of packaging as one control in the system, not a repair for a production fault.
Can packaging stop sugar bloom?
Good moisture protection can reduce the risk significantly because humidity and condensation are central to sugar bloom. Airtight packaging and correct cold-to-warm handling are therefore especially valuable.
Does a chocolate gift box need individual cavities?
Not because of bloom specifically. Cavities solve movement and separation problems. They are useful when individual chocolates would otherwise collide or rub during presentation and delivery. For moisture protection, check the properties of the primary packaging separately.
Should I use compound chocolate instead of couverture in hot weather?
That depends on your product and production setup. Compound removes the tempering requirement and can simplify moulding and coating, while couverture gives you a different chocolate formulation and requires more precise processing. Read our compound vs couverture comparison before making the decision.
Do silicone chocolate moulds cause bloom?
The mould material alone is not enough to diagnose bloom. The more useful checks are cleanliness, dryness, chocolate preparation, setting and storage. You can explore different formats in our chocolate mould collection, but changing mould shape will not correct a tempering problem.
How do I practise chocolate moulding before moving to couverture?
Compound is useful for learning filling, tapping, mould handling, inserts and packaging without simultaneously learning cocoa-butter tempering. Our existing homemade chocolate bar guide walks through the moulding process in more detail.
The central decision: diagnose before you change everything
If chocolate turns white, do not change the recipe, chocolate brand, mould, refrigerator and packaging all at once.
First decide whether the evidence points towards fat bloom, sugar bloom or another quality problem.
For fat bloom, investigate couverture tempering, cooling, temperature cycling and filling-fat migration.
For sugar bloom, investigate moisture, condensation and cold-to-warm handling.
Then change one part of the system, document the result and run another controlled batch.
That approach is slower than guessing for the first ten minutes and much faster than ruining the same chocolates for three months.
When you are ready to tighten up your chocolate workflow, the most relevant places to continue are our compounds and couverture chocolates, chocolate moulds, chocolate wrapping essentials and chocolate boxes.
Choose each one for the job it actually needs to do: chocolate formulation, moulding, primary wrapping, movement control or presentation. That is a much stronger system than expecting one product or one storage trick to solve every chocolate problem.